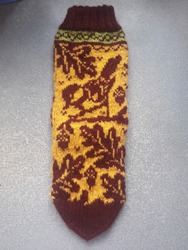
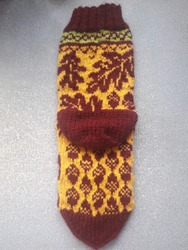
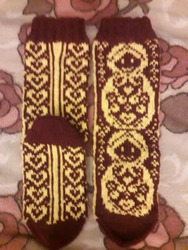
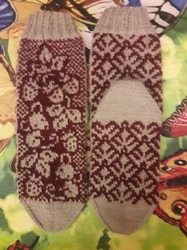
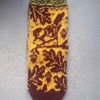
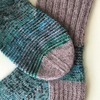
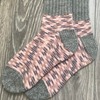
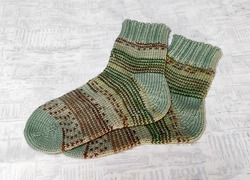
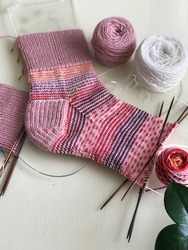
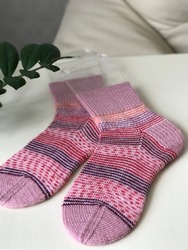
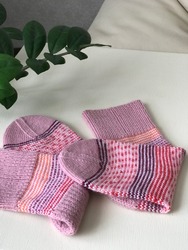
Девочки, может кто то поможет перевести описание носков. Пробовала вязать по гугловскому переводу, но видно что то я поняла неправильно, ничего не получилось или может кто видел в сети перевод этих носков. Картинку вставить не могу, поставлю ссылку https://knitty.com/ISSUEss14/PATTstringtheory.php?fbclid=IwAR1Cn0yQNxxyuw5wGiLDnLkRP2eUhhNNJDn1PlGwuBZe7faB8PvPwZurNkM
Knit one round.
Rnd 1: [K1, LLI, [s1, k1] rep to last st of needle, RLI, k1] twice. 4 sts increased.
Rnd 2: [K1, LLI, knit to last st of needle, RLI, k1] twice. 4 sts increased.
Rnd 3: [K1, LLI, [k1, s1] rep to last st of needle, RLI, k1] twice. 4 sts increased.
Rnd 4: [K1, LLI, knit to last st of needle, RLI, k1] twice. 4 sts increased.
Repeat Rnds 1-4 1[1, 2, 2] more times.
Work Rnds 1-2 another 0[1, 0, 1] times. 68[80, 92, 104] sts.
Foot
Rnd 1: [RLI, k1, pm, k1, LLI, k13[16, 19, 22], k2tog, pm for center, ssk, k to last two sts of needle, RLI, k1, pm, k1, LLI] twice.
Rnd 2: [Knit to last st of needle, p1] twice.
Note: In the following rounds, you will be working [k1, p1] ribbing at the beginning and end of the needles. The ribbing at the start of the needle is to start with k1, the ribbing at the end of the needle is to end with a p1. The stitch count will vary, sometimes there will be an odd number of stitches, sometimes an even number. If you have an odd number of rib stitches, you will begin and end the start-of-needle ribbing with k1, and begin and end the end-of-needle ribbing with p1. If you have an even number of stitches, you will begin both sets of ribbing with k1 and end with p1. For the first repeat of Rnd 3, you will only have 1 st, so simply work k1 at the start of the needle and p1 at the end of the needle.
Rnd 3: [Work [k1, p1] ribbing to 1 st before first marker, RLI, k1, sm, k1, LLI, knit to two sts before center marker, k2tog, ssk, knit to last st before last marker on needle, RLI, k1, sm, k1, LLI, [k1, p1] to end of needle] twice.
Rnd 4: [Work [k1, p1] ribbing to 1 st before first marker, k1, sm, knit to last marker, k1, work [k1, p1] ribbing to end of needle. Rep once more to end of rnd.
Repeat Rnds 3-4 7[8, 9, 10] more times.
There should now be a total of 104[120, 136, 152] sts. 10+16+16+10[11+19+19+11, 12+22+22+12, 13+25+25+13] sts between markers on each needle.
Instep
Note: remove center marker from both needles on the next round.
Note: For sizes XS & M, the same chart is used on both needles; for S & L, different charts are used on the two needles.
Rnd 1, sizes XS and M only: [Work ribbing as set to 1 st before marker, RLI, k1, work chart A to last marker, k1, LLI, work ribbing as set to end of needle] twice.
Rnd 1, sizes S and L only: Work ribbing as set to 1 st before marker, RLI, k1, work chart B to last marker on needle, k1, LLI, work ribbing as set to end of needle. Work ribbing as set to 1 st before marker, RLI, k1, work chart C to last marker, k1, LLI, work ribbing as set to end of needle.
Rnd 2: [Work ribbing to 1 st before first marker on needle, k1; work Chart as set to last marker; k1, work ribbing as set to end of needle] twice.
Work Rnds 1-2 5[4, 5, 4] more times. There should now be a total of 162[172, 198, 208] sts. (16+49+16[16+54+16, 18+63+18, 18+68+18] sts, divided by markers on each needle.)
Rnd 3: [Work ribbing to 1 st before first marker on needle, RLI, k1; work Chart as set to last marker; k1, LL1, work ribbing as set to end of needle] twice.
Work Rnd 3 11[13, 15, 17] more times. There should now be a total of 234[256, 394, 316] sts. 28+61+28[30+68+30, 34+79+34, 36+86+36] sts between markers on each needle.
Slip the 28[30, 34, 36] sts to first marker and after second marker on scrap yarn, for both needles. 61[68, 79, 86] live sts rem in the center on both needles. DO NOT CUT THE WORKING YARN!
Fold your work in half, with wrong sides together, holding them so that the working yarn is on the left side. You are now going to join the two rows of sts from right side to left.
Use the dpn or a crochet hook to "seam" the sts together like this: slip one st from your front needle to the dpn, [slip one st from your back needle to the dpn, pull the first st over the second, slip one st from your forward needle to the dpn, pull the first st over the second] rep until all the sts of your front needle have been used. Slip the last st of your back needle to the dpn, pull the first st over the second. You should now have only one st left on your dpn. This stitch will become the first of the new round.
So far, the sock is completely symmetrical, and the toe and the leg can be worked from either end. To reduce the number of ends to be woven in, we work the leg starting from the still-attached yarn.
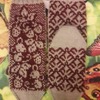


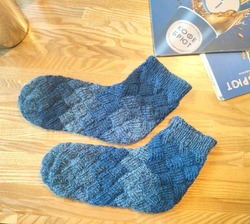
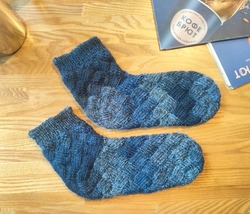
 Тоже планирую связать носки "Мариус". И лопапейсу "Мариус" от Даши так же.